For experiment 2 I related back to my first concepts of testing out how explosions would impact there surroundings when confined within a space. I applied similar methods using the 363 George Street models that I modeled up using solidworks in conjunction with sketchup.
My first model is just the cactus model where a zoom technique has been applied. Using this zoom technique it gives the user an insight of the layout whole of the cactus model and a close look at the spaces within the envelope. By showing the inside spaces, we can see places where an explosion can occur and shows how this blast could expand and travel through the cactus model.
My second model is my Y% where the epicenter is at the bottom of the tower. The explosion then projects up towards the top. While relating back to my first experiment I wanted to keep the explosion concealed within the envelope. By using a rotate technique we can see the building in its natural state and then contrast it to the other side where we see the complete annihilation of the insides of the envelope. I based my explosion within the building in a vertical nature. Because the explosion is confined within a skyscraper, it was best to explore the detonation of it vertically, as so to keep the blast radius from escaping horizontally out of the envelope. I mimicked the explosions from a volcanoe blast where the force within expands outwardly as it gets higher and within my model as the blast reaches the middle to the top, the area is nearly completely destroyed.
The third model is the X% where I used the same concepts from my second model but concealed it at a different degree. Instead of mimicking the blast radius through just the inside of the envelope, I wanted to test how the explosive force would fair out if it detonated at the same epicenter but was then confined to the path of the actual cactus model within the building. By using a pan technique we can follow the detonation from the bottom of my building to the top. While its panning we can see the scarring effects of the explosive force as it intertwines through the envelope. It then escapes out of the narrow viewing shafts within the cactus before eventually breaking through the roof.
Monday, September 22, 2008
Experiment 2 - Solidworks Models
363 George Street Cactus Solidworks Model

363 George Street X Value Solidworks Model
363 George Street Y Value Solidworks Model
363 George Street X Value Solidworks Model
363 George Street Y Value Solidworks Model
Experiment 2 - 3DS MAX Models
Zoom Cactus 3DS MAX Model

Rotation Y Value 3DS MAX MODEL
Pan X Value 3DS MAX MODEL
Rotation Y Value 3DS MAX MODEL
Pan X Value 3DS MAX MODEL
Experiment 2 - Solidworks Volume Calculations
Cactus Model Percentage
Volume= 102583.21 m3
X% Value = 66% 67704.9186 m3 Retained
 Y% Value = 41% 42059.1161 m3 Retained

Volume= 102583.21 m3

X% Value = 66% 67704.9186 m3 Retained
 Y% Value = 41% 42059.1161 m3 Retained
Wednesday, September 10, 2008
 363 George Street Envelope
This is the Envelope model that I created using Solidworks. To create the cactus model, I plan to create several planes throughout my envelope and by using these working planes I can begin extruding voids to try resemble the original sketchup cactus model . Once I have done this I plan to then calculate my x and y percentages and determine an epicenter within a public accessbile space to test my explosion.
SolidWorks Tutorials
 Tutorial 1
Solidworks 2008 took some time to get used to as alot of the toolbars that you use are hidden away to allow more visual space within the program. However when using the help menu and tutorial guide, by clicking on the actual icons in the tutorial menu, it will automatically bring up the hidden toolbars allowing you to use them.
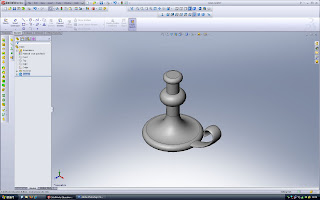
 Tutorial 2
This tutorial was quite interesting as it showed how useful the Loft tool can be as well as how you can create nearly anything in solidworks. Especially for creating the curved back of the hammer in this tutorial, I used a tool called flex where you select the work plane and you can bend or rotate any part of the object.
Tutorial 3
In this tutorial the tool sweep is useful as you create the profile outline of the object you want to create and then apply a sweep so that it rotates 360 degrees. With this feature alot of exciting circular parts can be made in conjunction with other tools. After using solidworks for these tutorials I have found that it is quite similar to 3ds max but a little bit more restricted in terms of how freely you can create and adjust models.
Subscribe to:
Posts (Atom)