Friday, November 7, 2008

EXPERIMENT 3-UT3

For experiment 3 I worked on the matinee. Michael Bao worked on particles and Joanne Vella worked on Kismet. We decided to use the theme of jenga as we imported our model into seperate parts. It worked out well for us as we incoporated the actual moving building elements as obstacles as well. The objective is to start at the roof level and make you way down to the bottom. There are multiple routes to get to the bottom but timing is crucial as the moving elements can trap and kill you.


Internal image of building showing internal passages.


Exterior of jenga themed building where it is seperated into 8 different parts with 7 of the parts movable.


Setting was set in a night time perspective with fog to create a scary ambiance


Crater entrances project two different entry points to filter your way down to the bottom


Elevated platforms provide a easy transition to help manoeuvre down the building


Perspective of the start of the game where all players are situated on the 1 platform that travels up the building to the roof.

Another way to manoeuvre down the building is by using the platforms situated outside of the building which lead inwards towards craters on the side.


Moving building components become obstacles that can trap, push and crush you

Objective of the game is to reach the bottom here where a trigger sensors when a player has touched the ball and notes all other competitors.
30 Second Clip


UT3 Map File
DM-finalassignment.ut3
UT3 Demo File 1-Draft
Player-2008_11_07-12_38_4.demo
UT3 Demo File 2 - Final
Player-2008_11_07-13_23_0.demo


Wednesday, October 15, 2008

Thursday, October 9, 2008

Monday, September 22, 2008

Experiment 2 - 3 x 10 Second Animations

For experiment 2 I related back to my first concepts of testing out how explosions would impact there surroundings when confined within a space. I applied similar methods using the 363 George Street models that I modeled up using solidworks in conjunction with sketchup.

My first model is just the cactus model where a zoom technique has been applied. Using this zoom technique it gives the user an insight of the layout whole of the cactus model and a close look at the spaces within the envelope. By showing the inside spaces, we can see places where an explosion can occur and shows how this blast could expand and travel through the cactus model.


My second model is my Y% where the epicenter is at the bottom of the tower. The explosion then projects up towards the top. While relating back to my first experiment I wanted to keep the explosion concealed within the envelope. By using a rotate technique we can see the building in its natural state and then contrast it to the other side where we see the complete annihilation of the insides of the envelope. I based my explosion within the building in a vertical nature. Because the explosion is confined within a skyscraper, it was best to explore the detonation of it vertically, as so to keep the blast radius from escaping horizontally out of the envelope. I mimicked the explosions from a volcanoe blast where the force within expands outwardly as it gets higher and within my model as the blast reaches the middle to the top, the area is nearly completely destroyed.


The third model is the X% where I used the same concepts from my second model but concealed it at a different degree. Instead of mimicking the blast radius through just the inside of the envelope, I wanted to test how the explosive force would fair out if it detonated at the same epicenter but was then confined to the path of the actual cactus model within the building. By using a pan technique we can follow the detonation from the bottom of my building to the top. While its panning we can see the scarring effects of the explosive force as it intertwines through the envelope. It then escapes out of the narrow viewing shafts within the cactus before eventually breaking through the roof.

Experiment 2 - Solidworks Models

363 George Street Cactus Solidworks Model
363_george_street_cactus.LDPRT

363 George Street X Value Solidworks Model
363_george_X_Value_percenLDPRT

363 George Street Y Value Solidworks Model
363_george_Y_VALUE_PercenLDPRT

Experiment 2 - 3DS MAX Models

Zoom Cactus 3DS MAX Model
Zoom-Cactus_Model.max


Rotation Y Value 3DS MAX MODEL
Rotation-Y_VALUE.max


Pan X Value 3DS MAX MODEL
Pan-X_VALUE.max

Experiment 2 - Solidworks Volume Calculations

Cactus Model Percentage
Volume= 102583.21 m3

X% Value = 66% 67704.9186 m3 Retained
Y% Value = 41% 42059.1161 m3 Retained

Wednesday, September 10, 2008

363 George Street Envelope

This is the Envelope model that I created using Solidworks. To create the cactus model, I plan to create several planes throughout my envelope and by using these working planes I can begin extruding voids to try resemble the original sketchup cactus model . Once I have done this I plan to then calculate my x and y percentages and determine an epicenter within a public accessbile space to test my explosion.

SolidWorks Tutorials


Tutorial 1

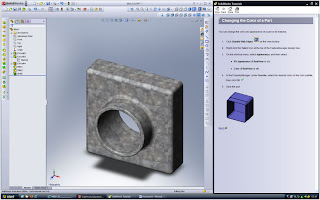
Solidworks 2008 took some time to get used to as alot of the toolbars that you use are hidden away to allow more visual space within the program. However when using the help menu and tutorial guide, by clicking on the actual icons in the tutorial menu, it will automatically bring up the hidden toolbars allowing you to use them.


Tutorial 2

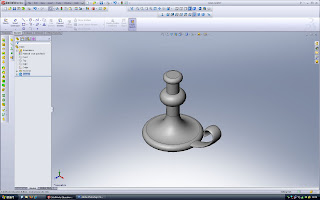
This tutorial was quite interesting as it showed how useful the Loft tool can be as well as how you can create nearly anything in solidworks. Especially for creating the curved back of the hammer in this tutorial, I used a tool called flex where you select the work plane and you can bend or rotate any part of the object.


Tutorial 3

In this tutorial the tool sweep is useful as you create the profile outline of the object you want to create and then apply a sweep so that it rotates 360 degrees. With this feature alot of exciting circular parts can be made in conjunction with other tools. After using solidworks for these tutorials I have found that it is quite similar to 3ds max but a little bit more restricted in terms of how freely you can create and adjust models.

Monday, August 18, 2008

EXPERIMENT 1- CLIP 2 COMPILED MACHINIMA


THESE VARIOUS CLIPS WERE ALL SOURCED FROM YOUTUBE AND ARE MY REPRESENTATION OF WHAT EXPLOSIONS AND POROSITY REPRESENT.

REFERENCED YOUTUBE VIDEOS:

Nuclear explosion in Crysis - adrien27300
Crysis Explosion Madness - Wheeto77
Machinima Test - Explosion - hypermant
CRYSIS - EXPLOSIONS in real time- j20062006
Music - The Game ft Lil Wayne - My Life

EXPERIMENT 1-CLIP 1


FOR MY CUSTOM MACHINIMA I RELATED BACK TO MY EARLY EXPERIMENTS ON POROSITY AND HOW DIFFERENT OBJECTS WERE AFFECTED BY EXPLOSIONS IN OPEN AND CONFINED SPACES. FOR THIS EXPERIMENT I USED STACKED TYRES AS THEY WERE SMALL OBJECTS THAT REACTED WELL WHEN EXPOSED TO AN EXPLOSIVE FORCE. I THEN CREATED 4 INVISIBLE WALLS AND ROOF AS BOUNDRIES FOR THIS SPACE AND PLACED THE OBJECTS INSIDE. TNT STICKS WERE USED TO CREATE AN EXPLOSIVE FORCE.

References:
Video created using GMOD and then recorded using fraps. Video was complied and edited using Sony Vegas and then uploaded onto youtube.
Music: Gym Class Heroes ft The Dream - Cookie Jar

Thursday, August 14, 2008

WEEK 2 TASK


With the second experiment I tried to convey across the idea of boundries within a space. I created a space where objects could be blown up but were limited by invisible walls. With this in mind I used different kinds of objects with different physical properties to see how they would react when detonated near an explosive device such as dynamite sticks. For the first scene in my video I experimented with how barrels could be constrained inside a confined space when exposed to alot of explosive blasts from the dynamite sticks. Because the barrels couldnt propel outside the space the explosive blasts kept the barrels in a hovering state. With the last scene I wanted to see the effect of an explosion with stacked objects and attatched a camera to one of them to portray across what it would look like from a barrels point of view. For my Experiment 1 clip I want to convey across the same ideas that I have just stated but find a more suitable object that would show the affects of porosity more clearly from an explosion. I will experiment with open and confined spaces to see how the objects will react.

References:
Video created using GMOD and then recorded using fraps. Video was complied and edited using Sony Vegas and then uploaded onto youtube.
Music: Papa Roach - Last Resort

Monday, August 4, 2008

WEEK 1 TASK


This video was made using GMOD and is my attempt to see how porosity can be portrayed across when multiple objects are stacked together and simualtaneosly blownup.

Thursday, July 31, 2008

Machinima Explosion


This Machinima is an example of objects being propelled outwards from an explosive device. This video uses the game engine crysis and it shows alot of objects that are then blown up. I like this video because it emphasizes how an explosive force can have such an effect on each individual object in the scene that is near the explosion.

References
Crysis - EXPLOSION -VERY HIGH QUALITY-diramus